So I thought I'd make a quick guide to retouching on photoshop, as I learnt to do it last year and it's super easy.
First of all DO NOT BLUR SKIN
Never use the blur tool or Gaussian blur to fix imperfections on skin, because it doesn't look natural and it ruins the look of the skin
Secondly, don't overdo it. That can be difficult, but you have to learn there is a limit and over-editing can ruin an image.
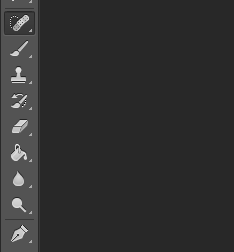
Photoshop has several tools for retouching skin and taking out blemishes. These are :
- Spot healing brush tool
- Healing brush tool
- Patch tool
- Content-aware move tool
- Red eye tool
- And I'm including the Clone stamp tool
(I won't be doing a Red Eye Tool tutorial, as I've never used it and it's pretty straightforward to use)
How to use the Spot Healing Brush Tool
This is my personal favourite tool to retouch, and I think it's the easiest method.
The secret to using the Spot Healing Brush Tool is the size of the brush. You should have it exactly the same size of the blemish as you want to remove otherwise, it tends to blur or changes the colour of whatever you're trying to remove.
 |
| Before - an image of my eye I'd taken ages ago after I'd put shimmer make-up |
I started by taking out a few of the smaller spots and then the lines under the eye, which I find the best way to take out lines and wrinkles is to make the brush very small and then follow the line very carefully. I took out some of the small highlights as well.
 |
| After using the Spot Healing Brush Tool |
How to use the Healing Brush Tool
To find the Healing Brush Tool, right click on where the Spot Healing Brush Tool is on your Photoshop toolbox and it will come up in a little menu.
It's similar to the Spot Healing Brush Tool, except you get to choose where the pixels that you're replacing come from, whereas the Spot Healing Brush Tool uses pixels from around the area that you have highlighted.
Again size is important here, so make sure your brush is no bigger than the blemish you're trying to get rid of.
 |
| After using the Healing Brush Tool |
I think I'm a bit lazy when using the Healing Brush Tool as you have to continuously move the space where you are taking pixels from otherwise the entire image is covered with the same pattern of pores. You can do this by pressing left click + Alt.
It's similar to the tool used within Lightroom, so if you prefer Lightroom to Photoshop, or want to improve your Lightroom skills, you should use this tool.
How to use the Patch Tool
I don't reccommend using this for all-over retouching, however it comes in handy for taking out major blemishes and unwanted items.
 |
| The blemish got selected |
To use it you have to draw a selection round the blemish and then drag it to an area that you want to copy
It's more time consuming than the first two options, hence why I'm not going to do a full picture
 |
| After the blemish was removed |
It's more time consuming than the first two options, hence why I'm not going to do a full picture
How to use the Content-Aware Move Tool
The Content-Aware Move Tool is like the opposite of the Patch Tool, instead of removing the area selected though, you move the selected area to replace a blemish
 |
| A patch has been selected to cover the shadow under the eye |
 |
| After the patch has been moved onto another area |
How to use the Clone Stamp Tool
I included this one, as I am used to using Gimp (This copy of Photoshop I am using is a free trial and runs out in about a month I think, but then I'll use the college's) and in Gimp, there is less tools to retouch portraits of people. In fact there is a Healing Brush and a Clone tool.
The clone tool is similar to the Healing Brush Tool, except more complicated and you have to keep an eye on where you have anchored it other wise you end up copying the entire image.
 |
| I went a little wrong here |
 |
| I should add that I am only a student and not a professional so I'm not amazing at Photoshop So I went with the Healing Brush Tool and after sharpening, dodging and burning, here is my final edit |


good post.
ReplyDeleteglitz retouching