
So this is my original image taken as part of a fashion shoot that I did for some fashion management students and the final edit that I did as part of my Advanced Image Editing class.


- Open the image in Photoshop. If it is a RAW file, tweak it to how you want it to look.
- Duplicate the original layer twice

- Select the middle layer and go to Filter>Blur>Gaussian Blur...
- Using the Blur filter, zoom in on an eye and set the blur so the eye is just able to make out.

- Close the filter once you are satisfied with it. and select the top layer.
- Go to Image>Apply Image... This will open up a window with a few options.
- In the Apply Image menu, select the middle layer in the Layer drop down menu.

- Set the Blending to Subtract
- Set the Scale to 2 and the Offset to 128.
- Close the Window and set the top layer's blending mode to Linear Light.

- This will have separated the colours and the detail within the image. Select the middle layer again and apply a Quick Mask by pressing Q and using the paintbrush to paint over the areas you want to edit.

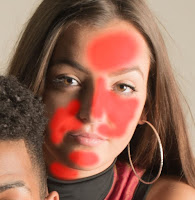
- Press Q again to exit the Quick Mask and then Ctrl + Shift + I to invert the selection and apply a Gaussian Blur to the selection.

- Then select the top layer and you will be able to sort any blemishes using the Spot Healing Brush Tool or the Healing Brush Tool (see here for a slightly in-depth tutorial on them)


And that should be you finished the skin retouching :)
No comments:
Post a Comment